How to Connect and Verify a Hyperliquid API Wallet in Antei AI
Connect and verify a Hyperliquid API wallet in Antei, confirm the correct account and network, and test the setup safely before live deployment.
On this page
An automated Hyperliquid strategy needs permission to sign trading actions. Antei uses a Hyperliquid API wallet—also called an agent wallet in Hyperliquid documentation—for that purpose. The API wallet signs on behalf of the approved master account, while account data remains associated with the master or sub-account address.
Key takeaway
Create and approve a dedicated Hyperliquid API wallet, connect it through Antei’s protected flow, verify the associated account, and test the setup with paper trading before any live deployment. Never paste the private key into a blog, screenshot, support message, or AI prompt.
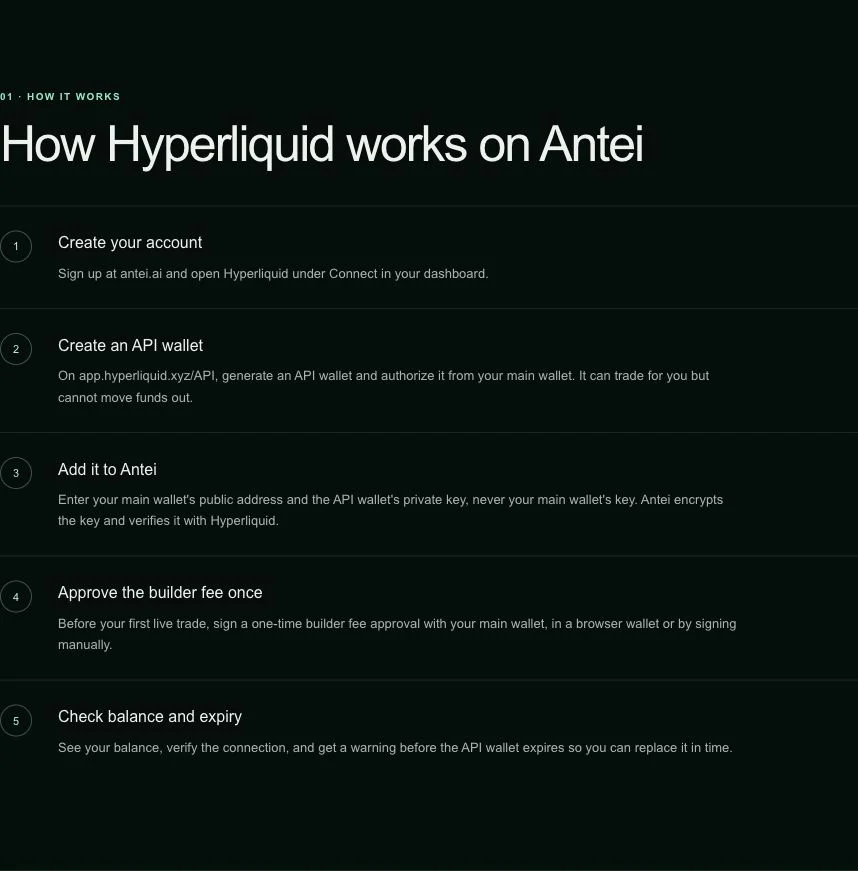
Antei separates wallet connection, strategy configuration, and deployment.
Step 1: Understand the two addresses
Your main Hyperliquid account address identifies the account whose positions, balances, and orders are being managed. The API wallet is a separate signer approved to act for that account.
This distinction matters during setup. Hyperliquid’s official documentation notes that account queries should use the actual master or sub-account address, not the agent-wallet address. Using the signer address as the account address can make a valid account appear empty.
Step 2: Create a dedicated API wallet
Use a separate API wallet for the Antei deployment rather than reusing a key across unrelated trading processes. This makes the permission easier to identify, rotate, and revoke.
Record the public address carefully. Keep the private key in a secure password manager or credential store until you enter it into Antei’s protected connection form. Do not place it in a normal note or screenshot.
Step 3: Approve it on the correct Hyperliquid account
Approve the API wallet from the intended master account or sub-account. Verify the network and account before signing. A mainnet approval and a testnet approval are separate contexts.
If you manage multiple sub-accounts, confirm which account the deployment should use. A technically valid signer attached to the wrong account is still an incorrect setup.
Step 4: Connect it in Antei
In the Antei Console, open Hyperliquid from the left sidebar. The Account tab shows the current connection. If no wallet is connected, follow the on-screen API-wallet flow. If an older signer is connected, use Replace API wallet rather than disconnecting blindly.
Provide the main account address where Antei asks for the trading account and the dedicated API-wallet credential where it asks for the signer. Check every address character before submitting. When the connection succeeds, the page shows API wallet verified and a last-verified time without revealing the private key again.
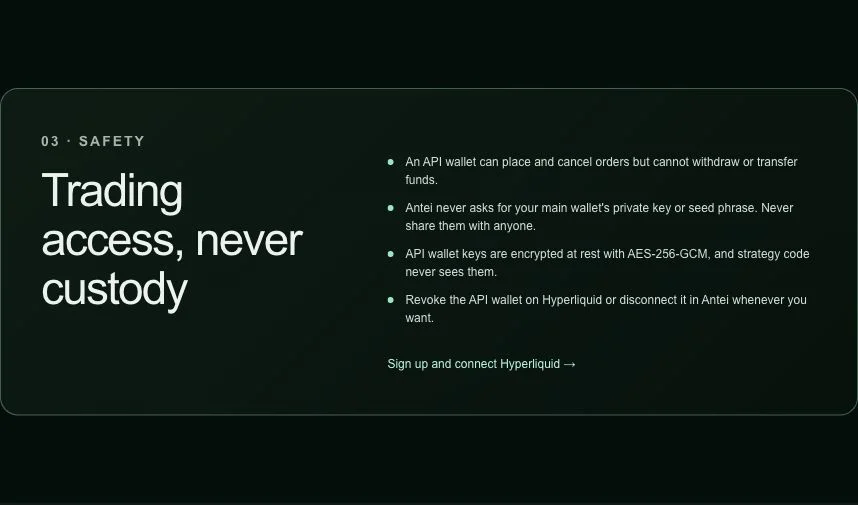
Antei keeps credential handling separate from strategy code and deployment controls.
Step 5: Verify the connection without placing an order
Open Hyperliquid → Account and click Verify API wallet. This checks trading permission. Use Check balance only to read public account data; a visible balance does not prove that the API wallet can sign orders.
Before live use, confirm the page says API wallet verified, the main-wallet address is the intended account, and the validity date is current. Then create a paper deployment. Do not place a live order merely to test the credential.
Review:
the displayed account address;
the selected market and timeframe;
strategy logs and data freshness;
paper status;
platform risk limits.
Do not use a live order merely as a connectivity test.
Step 6: Know what to do when verification fails
If Antei cannot verify the connection:
Check that the API wallet was approved by the intended master account.
Confirm that you entered the master account address where account data is requested.
Verify that the signer and account are on the same network.
Check whether the API wallet was replaced or deregistered.
Create a new dedicated API wallet if the credential may have been exposed.
Never send the private key to support. Share only public addresses and redacted screenshots.
Frequently asked questions
Can an API wallet withdraw funds?
Antei’s product flow is designed around trading permission, not withdrawal access. Keep the main wallet and any withdrawal authority separate from strategy code and prompts.
Can I reuse one API wallet for several bots?
It may be technically possible, but a dedicated signer per trading process or account boundary is easier to audit and reduces nonce and operational conflicts.
What should I blur in a screenshot?
Blur or remove private keys, QR codes containing secrets, seed phrases, email addresses, balances you do not want public, and any session or authorization token. A public wallet address is not a secret, but it may still be sensitive personal information.
Final answer
Treat the main account address and API-wallet signer as different roles. Approve a dedicated signer, connect it through Antei’s secure flow, verify the intended account, and prove the strategy in paper mode before authorizing live orders.
Official references: Hyperliquid API wallets and Exchange endpoint.
Risk notice: Trading involves risk. Protect credentials and verify every account and network before live use.